Why Tailwind's Instagram Smart Assistant is a Must Have Time and Anxiety Saver
A detailed overview of Tailwind's Instagram Smart Assistant and why I find it so useful as a blogger with a disability. (Sponsored Content)
Disclosure: I am a Tailwind affiliate which means that I will make money if anyone uses my Tailwind links such as the ones included below. I also received compensation from Tailwind for writing this article. Any results shared are my own and may not be typical. My opinions are also my own and that'll be the fun part to read. Or at least I hope it will. Let's find out together, shall we?
Intro
When Tailwind asked if bloggers would mind talking about their experiences with their Instagram Smart Assistant I raised my hand as quickly as I was able to. Reason being, I knew I'd be able to offer a perspective that others might not: not just that of a beginner blogger, but also as someone who deals with a disability.
As my paid subscribers know, I am a hot mess when it comes to things like social media. I know it exists, I know I need to use it to help promote my site. But how? When? Where? No, seriously, how? I have no clue.
The other thing working against me is that not only do I not have the knowledge but I don't have the energy. As someone with a disability I only have so much time in a day in which I can get anything done. And those are on my good days. Forget multitasking, it's hard enough for me to task. Write a blog post and learn Instagram best practices and algorithms and do hashtag research and - and - and - and -
Yeah no. Not happening. Straight up, I can't do it. Like I always say, if I had these kinds of capabilities I'd be happily working a full time job again. Sadly not an option for me.
So what's an aspiring blogger with limited personal resources to do?
You do what makes my therapist happy whenever I'm able to manage it: you ask for help.
Though in my case I still have panic attacks about asking actual humans for help. Luckily Tailwind's Instagram Smart Assistant is accessible via a web site and an app. I can work with web sites and apps. They don't require that I try to make small talk with them. I appreciate that about technology.
But we're talking about the Instagram Smart Assistant specifically, so let's dig into that.
What's an Instagram Smart Assistant?
The short answer is that Tailwind's Instagram Smart Assistant helps manage everything you post to Instagram.
The longer answer is that Tailwind is a company well known in the social media sphere for being a leader in social media marketing. Many people already know it because it is an official Pinterest Partner, which among other things means that it works with Pinterest to make sure that Tailwind users are in compliance with Pinterest's rules and they help facilitate communication and education between Pinterest and Tailwind users whenever changes are made to how Pinterest works.
Tailwind's Instagram Smart Assistant works in a similar way, both by being part of an official Instagram Partnership, but also with features which are specific to Instagram itself:
- Designing
- Smart Scheduling
- Visual Planning
- A Hashtag Finder
- Smart.Bio
- Analytics
I'm going to group some of these together as I explain them because they go hand in hand with your workflow.
Designing
If you are like me you have no graphic design skills whatsoever. Sure maybe you can take a cute photo of your pet but can you come up with something that's going to look professional, eye catching, and appealing to an audience you want to get to click on a link to your website?
Again, if you're like me the answer to that is no.
This is why it's great that Tailwind has Tailwind Create. I could make an entire article about how to use Tailwind Create but to give you the general idea for now the way that it works is you can upload your own images or use stock photos which Tailwind provides, you tell it what you want it to say (such as the title of an article), select colors and fonts, and then let it do the rest. It will create a selection of many graphics options to choose from in multiple styles and layouts. You can adjust the graphics if you want and then boom! You're done. Either use the scheduler to move on to the next step and/or download the graphics for future use.
As of me typing this, the graphics options Tailwind provides include Instagram Posts, Instagram Stories, Facebook posts, and of course Pinterest Pins.
For the purpose of this article I pretended I had nothing to work with except my website branding colors. I used Tailwind Create and the stock imagery it provided to make all of the graphics I needed from the title graphic above to the social media graphics at the end. To give a quick example, here's two Instagram posts that I picked:
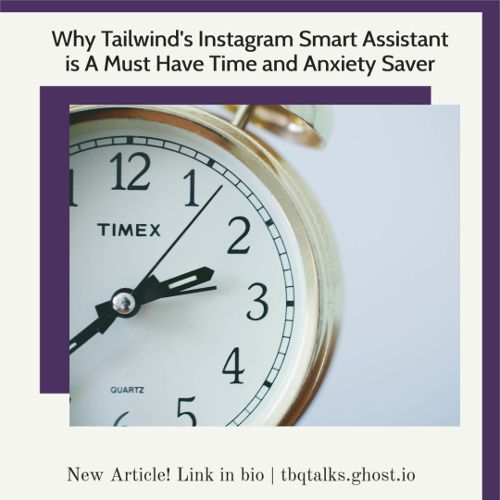
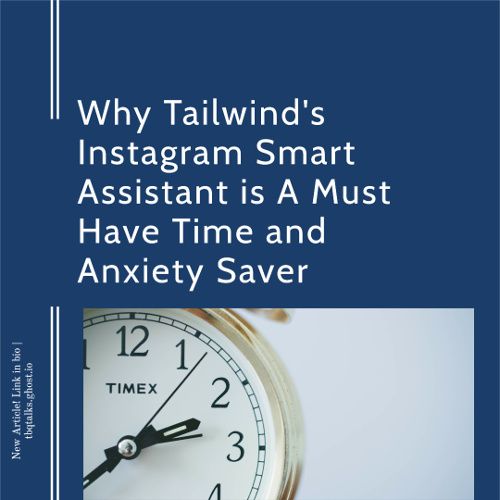
I could've had a lot more and in differing styles, but as you can see there was ample choice for me to pick options which worked with the graphic styles I'm already using on my site. It was also easy for me to get the same style in different social media formats to help with my branding across multiple platforms, and you can see that with the example graphics at the end of the article.
Smart Scheduling And Visual Planning
If there are any features that I personally would say fall into the "Smart" part of Tailwind's Instagram Smart Assistant it would be these two. And not just because the Scheduler actually has the word "Smart" in it, though I suppose that helps.
You see, rather than randomly grabbing posts as they are available and throwing them up on your Instagram whenever and however (like some people we could mention, and by "some people" I mean me), the Smart Scheduler and Visual Planner do all the work.
Prior to using Tailwind my method of posting to Instagram was once per day, around the same time per day (which I thought was helpful for some reason) and with whatever hashtags I could think of. My account didn't flounder in the wilds of the internet but neither was I gaining any traction.
The first thing the Smart Scheduler helped with is figuring out the best time of day for my posts. Did you know you should post at a different time of day if it's a Wednesday rather than a Thursday? I sure didn't!
Or maybe in your case you should. You see the Smart Scheduler figures out the best time to post based on your audience. It figures out when the people interested in what you do are more likely to see what you post and thus keep your post from being lost to the wilds of the algorithms.
I'll be honest with you, when I first started using the Smart Scheduler it was a big leap of faith. I posted at about the same time of day every day because I thought consistency was key (though of course being a human with limitations meant I wasn't always consistent with my timing anyway). When my first Smart Scheduler post was for a new article and it went up nearly twelve hours after I would normally post it I was sweating bullets. I was convinced that I was throwing the post out into the ether where nobody would see it and I would get no traffic from it.
But no! It actually worked! Yay!
The Smart Scheduler and Visual Planner work hand in hand. At their most basic what they do is let you upload and schedule your Instagram posts as far into the future as you have content to give. You can then use the grid of the Visual Planner to determine if the posts are providing the images and content flow that you want and drag and drop to adjust as needed.
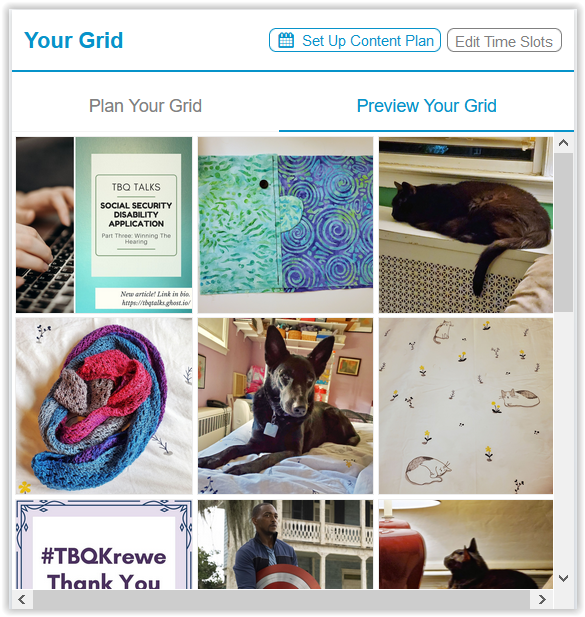
This is where I, a baby blogger who can only dip her toes into social media marketing, live. I have the energy to figure out one Instagram post per day and the posts tie in closely to what I'm already working on with my website, so I don't need to dive further. However when I get more advanced - or if you yourself are already more advanced - you can also use the Smart Scheduler and Visual Planner to get suggestions of what kind of content you should post and when, to adjust posting schedules, and more. These are features I'm definitely looking forward to taking advantage of in the future.
The other thing with the Smart Scheduler that I love is that it automates posting. Though full caveat this is where there is a difference between a paid and free account. No matter what account type you have, the Smart Scheduler will tell you when to post. If you have a free account and/or you do not have your Instagram account connected to a Facebook Page, you will need to use the Tailwind Instagram App to do the final step of making the posts. The way that it works is when the time comes to post you'll get a notification on your phone which you then tap on and it'll take you to the app to do the posting. These are the same steps you follow to post Instagram Stories through Tailwind because Instagram currently doesn't allow any third party apps to post Stories for you.
On the other hand if you do have your Instagram account connected to a Facebook Page and you have a paid Tailwind account then Tailwind will do the Instagram posts for you automatically. I won't lie, this feature is worth its weight in gold to me. There are a lot of reasons why I upgraded to a paid Tailwind account and this was a big one.
My anxiety is such that having to keep track of specific times and schedules is triggering to me. It looms over my brain and makes it impossible for me to focus until the task is done. Which was true of me posting to my Instagram all on my own without any Smart Scheduling help about what specific time of day I should be doing it.
So for me being able to create my posts, dump them into the scheduler, and walk away is a HUGE comfort and stress relief. I get so much mental energy back from not having to worry about anything but uploading the posts and writing the captions for them. Love it. Worth it. Would not go back to doing it on my own.
Speaking of writing the captions...
Hashtag Finder
In my modest attempt at Instagram research I knew that hashtags were good and that ideally you wanted a balance of hashtags which were popular enough that people were looking at them but not so popular that you were lost in a crowd of millions. But in terms of finding the ideal hashtags which hit that sweet spot while being appropriate for what I posted? I had to guess.
The Smart Assistant's Hashtag Finder does all that work for me. Even if all I am uploading is a picture of my service dog being adorable the Hashtag Finder immediately starts helping me by reading what I write in the caption and suggesting possible hashtags. The tags are color coded to tell me where they land on the scale of being obscure to too populated, making it easy for me to pick tags that are just right in both their topic and their audience. The list gets updated as I select tags or as I say that I don't find the current suggestions to be useful.
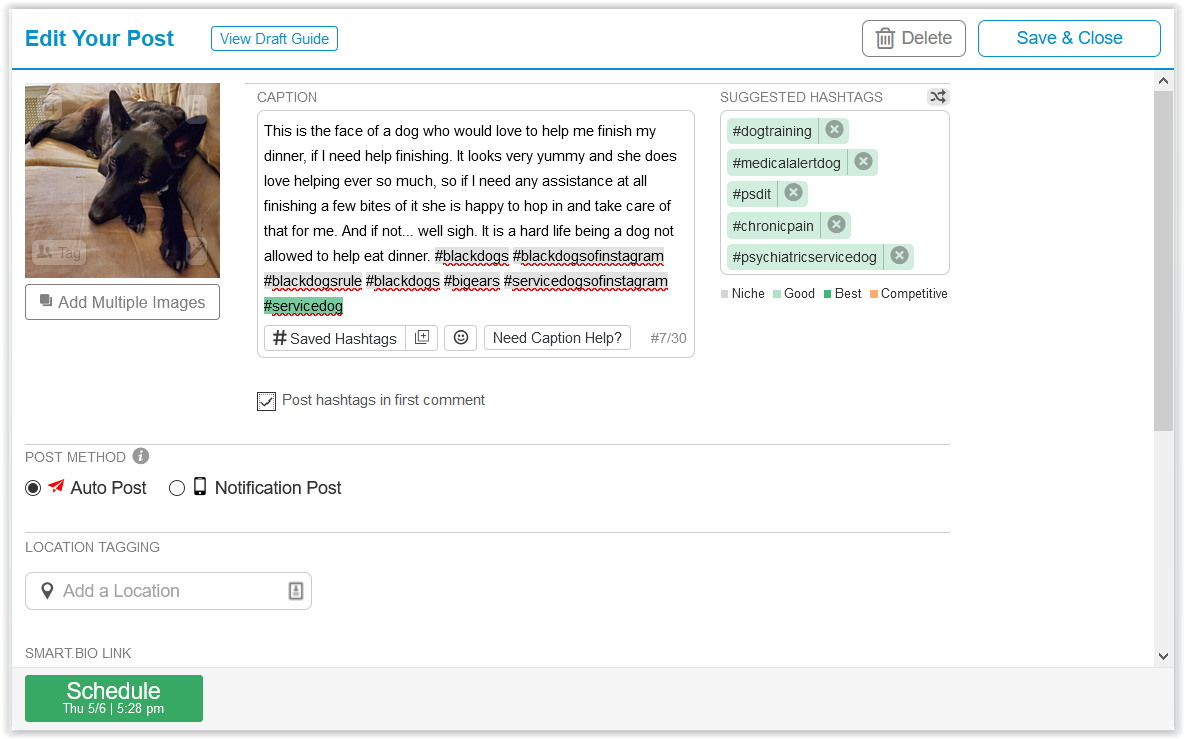
I can then also save tags that I use over and over again. Like most Instagram users, I post a lot of pictures of my pets. I can save those hashtags and select them from a menu when I do future posts about them.
I'm also able to make it so that my hashtags automatically go into the first comment of my post: present enough to be useful but without cluttering up my caption. This also allows me to try to use as many of the 30 allowed hashtags as I can without worrying that I'm turning off my readers. Of course I don't always use 30 because it's still important for the tags to be on topic. But the Hashtag Finder makes it so that I'm not scrambling to guess at some combination of words which might help. It does all the work for me.
Smart.Bio
If there is one feature of Tailwind Instagram that makes me want to grab people by the lapels and go "USE THIS! USE IT NOW!" it's the Smart.Bio. And the amazing thing is that this feature is 100% free. You read that right, free. Anybody can use it, no paid Tailwind account required. (You do have to sign up for an account, but you don't need a paid one.)
Anybody who has spent any time on Instagram knows the famous words "Link in Bio." We use it because Instagram doesn't let us put active links in our posts. Problem is, Instagram allows you to have one link in your bio and that's it.
The more commonly known workarounds are to either use social media sites which let you create a list of links which can be accessed from a single URL (we all know the ones) or to create a single web page of your own somewhere where you are responsible for setting up and updating the links every time you need to.
I used to use the former, you couldn't pay me enough to use the latter. I'm limited in my time and energy, remember? I'm already doing enough updating my regular website with blog entries, I don't have it in me to keep a link list current with up to the minute articles. And the problem with the former is that it's nothing but text. It's great for pointing people to your other social media accounts but for getting them to click on a specific URL? Good luck. Either you have a wall of text that makes their eyes glaze over or you have a single "Click here to read the latest!" style link which still requires your audience to hunt around for what they should be taken to directly.
Smart.Bio fixes this and again I can't rave about it enough. First up it does the basic list of links like certain other sites do:
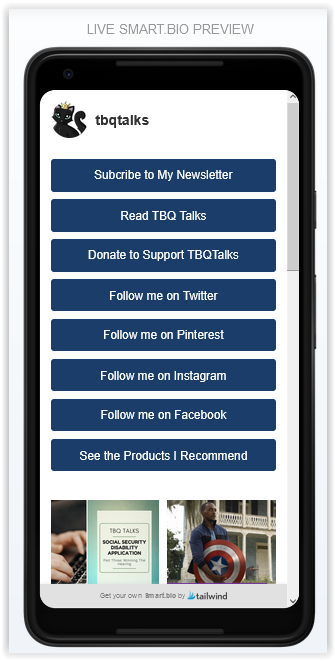
I use these to drive people to my main website and social media accounts and that's it. Those are the main things I want people to be aware of so that's all they need when they first see the link.
Next is when the magic happens: You can tie Smart.Bio to your Instagram Posts. Which first and foremost means visuals. No more wall of text! Now your audience has the beautiful graphics that you made to look at!
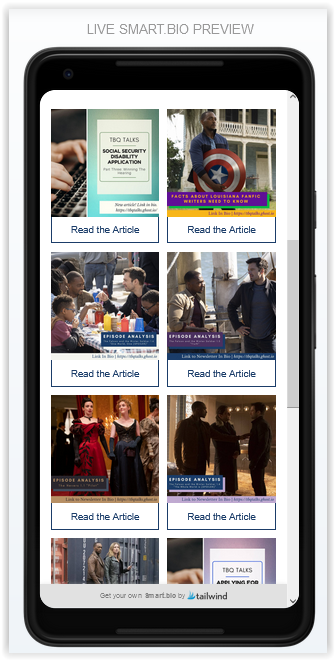
Moreover, the images are pulled directly from your Instagram Post. So now when you say "Link in Bio" and people look, they can immediately see what they are supposed to tap on.
I LOVE THIS FEATURE. As soon as I started using it I began squealing about it in my Instagram stories so everyone else would know about it and how awesome it was.
The great thing is that you are not limited in which Instagram Posts you use. You can go back to your previously posted "Link in Bio" posts and add them to your Smart.Bio. You can also set it up so that when new "Link in Bio" posts go live the Smart.Bio link is already there. (Note: If you are using a free Tailwind account you will have to add the link in manually after you do the post. However, if you have a paid account and set the post to go up automatically, you can set the link in advance so it goes live when the post does. I use the latter and LOVE it. Again: no anxiety for me. I set it, forget it, and move on with my day. Love it! Worth it!)
Another advantage of the Smart.Bio is that you can use it anywhere. Yes, the visual posts come from Instagram but that doesn't mean the Smart.Bio has to stay there. I use it as my link any time I want to drive people to follow me on social media. They click the link to get to my Twitter, Instagram, and so on and while they're there they can see the pretty pictures from my articles and be inspired to click those as well. And I know that actually worked because...
Analytics
The final piece of the Smart Assistant puzzle is the Analytics. I'll be honest: in my former working life I was, among other things, a numbers jockey. If I could pile every possible number into a database and then create reports out of it six ways to Sunday I was a happy camper.
In my current life I again do not have the energy or attention span. Again I can do a few hours here and there on a good day. Much as it breaks my heart, I can't play with numbers as much as I would like to.
But at the same time if you want to grow your online presence numbers can't be ignored.
So, in interest of full disclosure, though I don't use the Analytics features as much as I could or should, I'm glad that they are there. And that they are useful even for somebody like me who only has the ability to quickly glance at them in the hopes that things are looking up.
Again, cannot stress that my results are not typical and also that, as of me writing this, I have not been using the features long enough to have big, sexy numbers like some other bloggers do. If you want to have a better idea of what more typical results are you can check out this blog post by Tailwind.
But even so you can still see how in general my Instagram presence began to improve as I implemented Tailwind's Smart Assistant's features.

Also, and the numbers I am more interested in right now because they help me see where I am getting traffic, Smart.Bio lets you know which, if any, of your links are being clicked on:
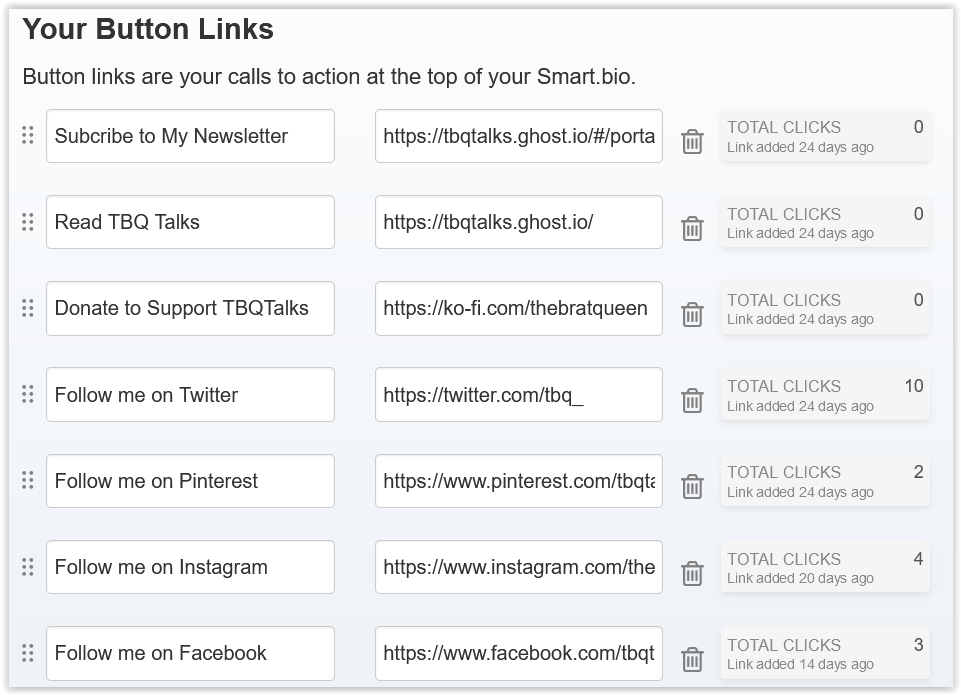
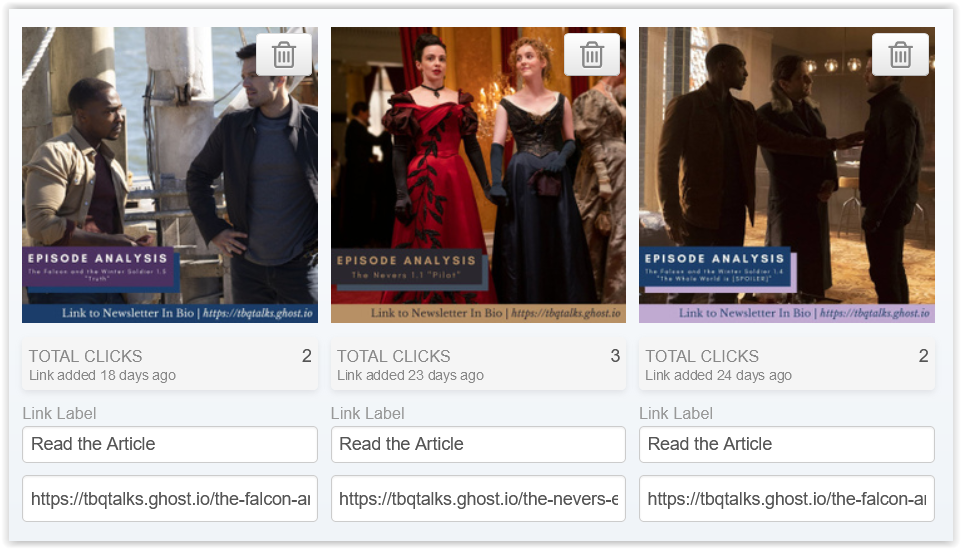
The numbers you see there are after I started using Smart.Bio as my default social media link. I had an article go viral and included my Smart.Bio link in it as a way to contact me. After the article's views leapt over 300% I saw an uptick in my Smart.Bio engagement. Primarily through social media clicks (as you can see in those numbers) but also in clicks on other articles as, after getting the social media links, they were inspired to go back to my website.
Without the specific numbers of which links they were using I would've had no idea of the specific traffic patterns. Sure I would've known that I was getting an increase in my audience but from where? And how? The Smart.Bio numbers told me and lets me know that it's worth my time to use it and to put it in front of more people. Win/win/win if you ask me!
Should You Sign Up?
Of course no review is good without a recommendation, so here's mine. As always, I'm giving my honest opinion.
If you are not looking to engage with social media marketing in any way whatsoever, you don't need this. For instance if you're just writing a blog or newsletter for your family, or you only want to build your audience off of your current Twitter followers and not grow your list or include Instagram in your marketing, this has nothing for you.
If you are a newbie blogger who only has the tiniest amount of energy for one thing extra you should sign up for the free account, especially if you already have an Instagram account you're using. It won't require you to use any more time or energy than you're already putting in by manually doing Instagram posts. Plus it will make that time and energy more efficient by telling you when to post, what hashtags to use, and so on. Plus Smart.Bio Smart.Bio Smart.Bio! Can I stress Smart.Bio enough? Smart.Bio! Free to use! Amazing stuff! Sign up for that alone!
If you are looking to use social media to expand your blog's audience you should sign up for one of the first two paid plan options (currently called "Pro" and "Advanced" as of me writing this). These will give you access to almost everything that Tailwind can do for you both for Pinterest and Instagram. They will also give you access to the automatic features, thus saving you a lot of time and energy. You can set up not only Instagram but Pinterest pins days, weeks, even months in advance and never have to worry about them. That alone is worth the money in my opinion. I'm on one of these tiers because of the features and automation and find it worth every penny. ***THIS IS THE OPTION I MOST RECOMMEND***.
If you already have a large audience and are looking for help managing your social media you should sign up for the highest tier (currently called "Max" as of me writing this). Basically the main difference between the paid tiers is how much volume you are able to do with them. For most people starting out this is the tier they're going to work up to someday. Unless you're managing a blog on behalf of an established business or person who already has a huge following. In which case yes absolutely dive in here because you'll need the flexibility that the highest tier gives in terms of the number of accounts you can manage and posts you can do. Also go you!
Final Thoughts and Images
And that's it. If I had to tl;dr it I'd say if you're looking to dip your toes in you should sign up for the free account because it lets you take advantage of the features and it costs you nothing. If you like the idea of the automation and/or you already know you're going to be doing some volume, sign up for a paid account. And of course once you sign up you can always upgrade as needed.
I hope you enjoyed and found the article helpful. If you have any questions feel free to hit me up on social media. (See what I did there? Smart.Bio! Get one for yourself! It's free!)
If you think others would enjoy this article, please share! Feel free to use these handy graphics which, if you'll remember, I made using nothing but the Tailwind Create and my own color choices. Not bad, eh?
Thanks for reading!

